Spring Fabrication Procedure
- Use a sharp knife to carefully pierce the bottom or top portion of a 2-liter soda bottle (pierce within the top or bottom area, not the straight sides).
- Use scissors to remove the straight cylindrical portion of the bottle.
- When the cylindrical portion is free, cut it vertically along the seam (some bottles do not have seams) to create a curly sheet that is about 6" by 13".
- Cut ribbons of 1.5" width (you should be able to get four ribbons that are 1.5 inches by 13 inches).
- Splice three of the ribbons end-to-end until you have the required length. Splices should be made as follows:
- Cut a V in one end of the first piece
- Cut a corresponding arrow in the end to be joined
- Tape the joint from the convex side, making sure the joined parts are in a straight line
- Tape the other side
- You may heat-treat the spring to increase its "springiness". Roll the spring into a tight coil, heat it with a hair dryer (don't melt it) and unroll it. You will find that the spring now retains its shape in the coiled position. When using it in the vehicle, wind it backwards.
- Use a pin to punch a small hole in one end.
- Thread a paper clip through the hole and connect it to the spring holding pin from within the spring case.
- Carefully staple or thumbtack the other end to the center of the axle. Slow and steady does it. Clamp the axle in a vise if possible. Use two staples side by side if your spring is wide enough.
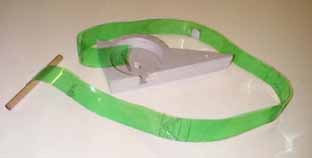
Your spring is now ready to install! Now think carefully about the direction you want the spring to wind! The spring naturally wants to coil. When installed in the car, it should be rolled in the other direction, or your car will have no power!